
Exhibo Editorial
How to Sign and Number an Edition
Pencil layout, fraction numbering and AP/HC/PP marks so every impression in your limited edition reads as authorised studio practice
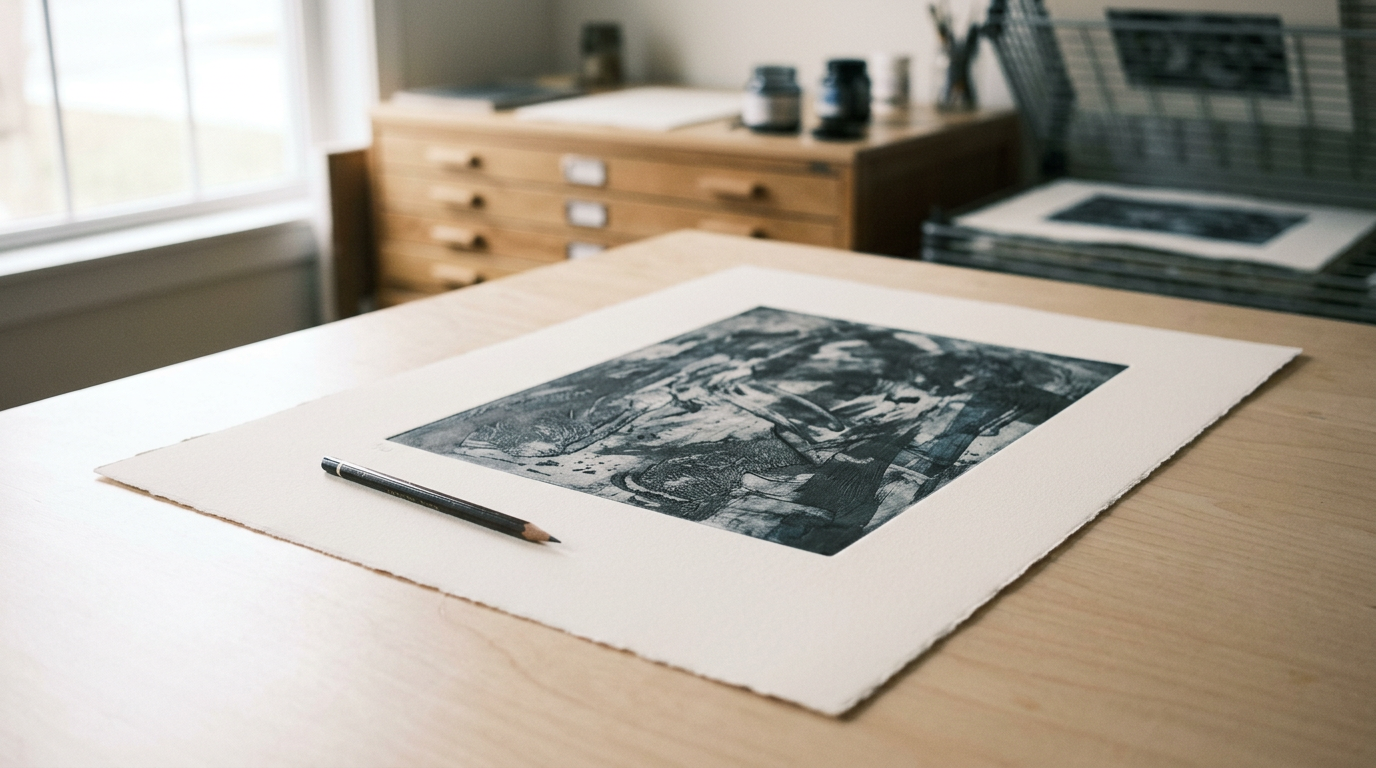
Sign a limited edition print in graphite pencil on the sheet itself after you have curated the run. Place the edition mark as a fraction under the image on the lower left (for example 7/30), write an optional title in the lower centre, and sign on the lower right, with or without the year. Use a sharp, hard pencil such as 2H so the mark stays crisp and resists smudge. Marks such as A/P, H/C, P/P or B.A.T. replace the fraction on proofs reserved outside the numbered set. Number the main edition only after you discard flawed impressions, and keep a written log so the denominator you declare matches what exists.
This guide is maker practice: where and how you write, which pencil habits workshops expect, and how proof abbreviations sit beside the signature. Deeper definitions of what edition numbers mean for buyers belong with edition numbers on prints (pending). The wider career series sits at artist career guide. For how public collections describe signed impressions in print rooms, browse museums.
Why Signing and Numbering Matter for Makers
A hand-written fraction and signature tell a buyer, dealer or museum registrar that you authorised this sheet as one of a declared set. The International Fine Print Dealers Association (IFPDA) glossary frames signing and numbering as a twentieth-century custom that limited circulation to the impressions the artist intended. Without that mark, a shop print, a later pull from an uncancelled matrix, or a reproduction of a painting can look similar on a wall. Your pencil line is the public claim that this impression belongs to the edition you named.
Galleries and specialist print fairs use the margin as a first authenticity check before they open a folder of paperwork. Buyer primers in that circuit treat the lower-right pencil signature as the artist’s approval mark and note that proofs outside the edition appear as letter codes such as AP, EA, PP or HC in place of the fraction. You control those codes. A buyer who learns them from a fair leaflet will expect your sheets to match the same grammar.
Consistency across the run protects you as much as it protects the buyer. If sheet 3/25 carries a ballpoint signature, sheet 12/25 sits in ink on the verso, and sheet 19/25 uses a different fraction style, a gallerist will treat the set as poorly controlled. Workshops such as Tamarind Institute treat signing as the last curated step: after a curator checks each impression against the bon à tirer, the artist numbers and signs only the accepted sheets. That sequence keeps the denominator honest.
Signing also closes the studio workflow. Once you write 1/20 through 20/20 and the agreed proofs, you commit to stopping. Print Council Aotearoa New Zealand’s terminology notes stress personal integrity here: once you set the number, you do not pull more impressions of the same image without changing the matrix into a new state. College Art Association (CAA) print publication guidelines call re-editioning a limited project unethical and, in some jurisdictions, a basis for purchaser claims. The pencil marks on the paper are the visible half of that promise; the logbook and any cancellation proof are the other half.
Collectors and institutions read margins the way cataloguers read inscriptions. Auction houses and museum object records often describe contemporary prints as “signed and numbered in pencil” with the fraction quoted in full. British Museum collection entries for nineteenth-century etchers such as Francis Seymour Haden record signatures below the plate-mark as a distinct inscription type from plate signatures. You are writing into that documentary habit whether you sell from a studio open day or through a publisher.
The same marks travel into framing, insurance schedules and later sales. A framer who cannot find the signature will phone you; an insurer who cannot match certificate to sheet will query the claim; a secondary buyer who sees “12/30” on paper and “edition of 50” on a PDF will walk away. Signing discipline is inventory control written in graphite. Artists who treat the margin as an afterthought spend years answering questions a clean session would have prevented.
Method: Curate, Lay Out, Then Write
Treat signing as a separate session from printing. Dry the sheets, stack them face up under clean paper, and clear a table large enough for one print at a time with elbow room for your writing hand. Wear clean cotton gloves or wash and dry your hands so skin oil does not tint the margin. Decide the layout on one spare or rejected sheet first: measure from the image edge, mark faint guide dots if you need them, then erase the dots before you start the real set. Handprinted’s UK editioning guidance and Print Council NZ both describe the same left–centre–right order; use that order unless a publisher contract names a different placement.
Curate before you number. Pull or print more sheets than the final edition if the process allows it, then remove misregisters, ink skips, fingerprints and paper creases. Tamarind’s curator role exists for this reason: flawed impressions are destroyed, not sold as “almost fine.” Reduction linocuts and other destructive processes force you to decide earlier; for stable matrices you can print in batches, but you still fix the total before the first fraction goes down. Write the agreed edition size, proof counts and paper type on a card taped above the table so you do not invent numbers mid-session.
Work through the stack in one sitting when you can. Use the same pencil, the same height of writing, and the same spelling of your name. Sign with the name buyers already see on your CV and invoices. If you use a monogram in the plate, still hand-sign the margin unless the edition is designed as unsigned. Keep a spreadsheet open: each row gets a number, a status (studio / gallery / sold / gift), and a date. That log is the document CAA expects artists and publishers to keep permanently and to issue with sales.
Pencil, pressure and the left–centre–right layout
Graphite is the studio standard because it is hard to reproduce with a press or inkjet and because soft errors erase without staining the paper. Printgonzalez’s workshop notes favour a sharp 2H over a soft sketching pencil: soft leads smear under glassine and under fingers during framing. Handprinted makes the same point in shorter form: pencil, not pen. Test the hardness on the same paper stock as the edition. If the mark digs a trench, ease pressure; if it looks grey and powdery, sharpen again or step one grade harder.
Place the fraction close under the image on the left, aligned with the left edge of the printed area or centred under the left third of the sheet. Write the individual number, a slash, then the edition total with no spaces if that is your house style, or with light spaces if your hand needs them. Pick one pattern and keep it. The centre title, when you use one, sits in quotation marks according to some UK studio habits (Handprinted) or without marks according to others; either works if the whole edition matches. The signature on the right should clear the image by a few millimetres so a window mount does not crop the name.
Date beside the signature when the year of printing matters to you or to a publisher contract. Many living artists date; many leave the year for the certificate. IFPDA notes that a description of a print as “signed” should mean pencil, ink or crayon on the sheet, and that a plate signature or stamped name needs separate wording. Do not confuse a carved monogram in the block with the hand signature that authorises the impression.
Sequence, gloves and full-bleed alternatives
Number after curation, not in press order. The fraction identifies place within the declared set; it does not have to record which sheet left the press first. Drypoint and other wearing techniques historically made early pulls sharper, which is why older intaglio editions sometimes tracked order with care; for most contemporary relief, screen and lithographic editions the quality standard is match-to-BAT, not press chronology. Sign each sheet immediately after you write its number so you never leave a stack half-marked overnight where someone else could confuse the sequence.
If the image bleeds to the paper edge, you have three common options. Write along the bottom strip of the image in a quiet tonal area; sign and number on the verso in the same left–centre–right logic relative to the sheet; or issue a signed certificate and still mark the verso with at least the fraction and initials. Whitechapel Gallery’s artist editions sometimes state “numbered and signed on reverse” in the product description so buyers know where to look. Tell the framer in writing where the marks sit so hinges and tape do not cover them.
Plate signatures and chops sit beside, not instead of, hand signing when both appear. A workshop chop embossed in the margin identifies the printer or publisher; Tamarind and Crown Point Press both use chops as workshop identifiers. Your pencil signature still says you approved the impression. If you print alone and skip a chop, the pencil marks carry more of the documentary load, so keep them neat.
Store signed sheets flat between glassine as soon as the graphite has set under a clean weight or overnight rest. Vertical leaning in a damp hallway can cockle the margin and blur soft graphite. When you ship, put a stiff board behind the print and a note for the recipient that marks sit on the recto lower margin or on the verso, so unpacking hands do not scrub the pencil with a cuff.
Materials Checklist and Failure Modes
A signing kit is small. The failures come from rushing, soft leads, wet ink nearby and missing paperwork rather than from expensive tools.
| Item | Role in signing / numbering | Typical use | Common failure if misused | Approximate UK cost band (check current prices) |
|---|---|---|---|---|
| Hard graphite pencils (2H–4H) | Hand number and signature | All margin marks | Soft HB smearing under glassine | £1–£3 per pencil |
| Sharpener or craft knife | Keep a fine point | Before each batch of 5–10 sheets | Blunt tip, grey dusty line | £3–£15 |
| Soft white eraser | Lift guide dots and light mistakes | Layout trials | Abrading soft sizing; pink eraser residue | £1–£5 |
| Clean cotton gloves | Keep oils off margins | Handling finished sheets | Dirty gloves transferring ink | £5–£15 |
| Steel rule and soft pencil dots | Align height of marks | First layout sheet | Writing into the image | £5–£20 |
| Edition log (spreadsheet or bound book) | Match fractions to sales and proofs | Every edition | Oral memory only; duplicate numbers | £0–£20 |
| Glassine or acid-free tissue | Interleave signed sheets | Storage after signing | Sheets rubbing graphite onto neighbours | £10–£40 per pack |
| Certificate / documentation template | Title, size, process, edition, proofs | Each sale or consignment | Vague “limited edition” with no total | £0 (self) or printer fee |
| Publisher or workshop contract (if any) | Fix AP/PP/HC counts before printing | Collaborative editions | Signing proofs you did not agree to release | Legal / admin time |
| Cancellation evidence (scored plate photo, destroyed file note) | Close the edition | End of limited run | Matrix left live “just in case” | Time / workshop fee |
Skip ballpoint, gel pen and permanent marker on rag papers: ink can feather, show through, or look printed when photographed. Skip signing through a mount opening after framing; graphite on glass and on acrylic is a conservation mess. Skip inventing a second “deluxe” edition of the same image at the same size without disclosing the first edition in the documentation.
Proof Marks: AP, HC, PP and BAT
Proof abbreviations replace the edition fraction on the lower left. They are not a licence to print without limit. CAA’s fine art print publication guidelines treat artist proofs as property of the artist, recommend a guide ceiling of about 10 per cent of the numbered edition, and require every surviving proof type to appear in the print documentation. IFPDA’s glossary ties artist’s proofs to an older payment custom and notes the common annotations A.P. and E.A. (épreuve d’artiste). Hors commerce (H.C.) impressions began as “not to sell” exhibition and publisher copies; IFPDA records that from the late 1960s they also entered the market as extensions of editions. Printer’s proofs reward the lead printer. The bon à tirer is the single approval proof the printer matches.
State the full breakdown before you ink the first sheet of the run. A contract that says “edition of 40 plus 4 A.P., 1 P.P., 1 H.C., 1 B.A.T.” gives every party the same arithmetic. Tamarind’s documentation practice goes further: the workshop records numbered prints, artist’s proofs, the BAT (which belongs to the printer there), archive impressions and trial proofs, and makes that documentation available on request. Your solo studio can copy the honesty of that list even if you never emboss a chop.
Write proof abbreviations in the same pencil and the same hand height as the edition fractions so the set looks like one voice. Mixed ink for proofs and pencil for numbers reads as two different authorisation systems on one project. If a publisher’s house style demands Roman numerals for APs (A/P I/V) or Arabic (A/P 1/5), lock that choice in the contract and on your template certificate before the signing day.
Artist’s proofs and hors commerce
Write A/P or AP on the left where the fraction would sit, or number the proofs as A/P 1/4, A/P 2/4 when you hold more than one. French-language markets often use E.A.; Spanish-language documentation may use P.A. Pick the abbreviation your buyers already meet in your region and keep it stable across years. Artist’s proofs should match the edition in paper, ink and quality. Handprinted notes that some studios reserve slightly flawed pulls as APs; many publishers reject that habit and demand AP quality equal to the numbered set. Follow the stricter standard if you sell through dealers.
H/C or HC marks a hors commerce impression. CAA asks the agreement to state who owns the H.C., whether it is signed, and whether it may be sold. In earlier practice these sheets protected numbered stock from travel and display wear. If you later sell an H.C., say so on the invoice and on the certificate; do not renumber it into the main edition without disclosure. Presentation proofs dedicated to a person belong in the same honesty category: mark them and log them.
Printer’s proofs, BAT and trial proofs
P/P or PP marks the printer’s proof. CAA’s custom is one printer’s proof for the lead printer of an edition. Tamarind’s collaborative residencies often retain one printer’s proof and one archive impression while returning the numbered edition and artist proof to the artist. Sign the P/P with the same care as the edition; the printer’s archive may be the sheet a future catalogue raisonné photographs.
B.A.T. (bon à tirer) or R.T.P. (ready to print) marks the approval impression. IFPDA defines it as the final trial proof the artist signs to tell the printer how the edition should look; there is only one. CAA notes ownership of the BAT varies by contract: sometimes the printer keeps it, sometimes the artist, sometimes it is later sold. Do not produce a stack of sheets marked BAT. Trial proofs (T/P), colour proofs and working proofs document process; if you keep them, annotate and list them. If you destroy them, say so in the documentation so a later “found” trial does not look like undeclared inventory.
Edge Cases: Variable Editions, Digital Files and Open Runs
Not every sheet fits the classical identical edition. Variable editions (V/E or E/V), monoprints related to a shared matrix, and digital originals each need clear marks so buyers are not guessing. Handprinted and Print Council NZ both describe V/E numbering when hand colour, chine collé or wiping changes from sheet to sheet. You still declare a total. You still sign. You add V/E before the fraction or state “variable edition of 12” on the certificate so the variability is named rather than accidental.
Digital and inkjet originals that exist only as prints can be signed like any other edition if you treat the file as a matrix you control. CAA’s 2015 revision expects documentation of printer model and colour profile for digital prints, and asks publishers to certify whether they still hold copies of the file. IFPDA distinguishes an original digital print conceived as a print from a reproduction of a painting. If you sell reproductions of paintings, say “reproduction” on the paperwork; Handprinted advises against hand-signing giclée reproductions as if they were original prints, preferring a signature inside the image file when a mark is needed. Whatever ethic you adopt, state it the same way on every sheet and every invoice.
Open editions change the left-hand mark. Some artists write O/E or OE with a running number (OE 14) and no denominator. Others sign without numbers. Limited-edition language on a certificate while you keep printing is the failure mode that damages trust. If the run is open, call it open. If you later close it, publish the final total and stop.
Posthumous and estate editions follow different signature customs: stamped or estate signatures, or unsigned sheets with estate documentation. Living makers should not imitate those marks. If you cancel a plate, Print Council NZ describes a cancellation proof (C/P) pulled from the defaced matrix; CAA asks for a cancellation proof or other evidence that the matrix cannot print again, and for digital work a statement about remaining files. Photograph the scored plate or keep the cancelled stone’s documentation with the edition file.
Photograph editions create a related edge case. Some photographers edition on the verso label or on a certificate rather than on the face of the print. If you work across printmaking and photography, keep one house rule per medium and state it on invoices so buyers are not hunting for a lower-left fraction that never existed. Mixed practices inside a single show look careless even when each sheet is correct on its own terms.
What Professionals Do in Workshops
Master printers and workshop curators separate approval, quality control and signing into distinct jobs. At Tamarind, the artist signs a BAT after colour and paper trials; the printer then editions to that standard; the curator compares each impression to the BAT, destroys failures, applies workshop and printer chops, and oversees numbering and signing. The artist’s hand still authorises each sheet, but only after someone else has refused the weak ones. Crown Point Press and similar ateliers publish printer names with chops so credit and responsibility stay visible.
CAA’s guidelines turn that culture into contract language: edition size fixed before printing; AP count capped as a guide at 10 per cent; publisher proofs likewise limited; one printer’s proof; trial proofs accounted for; documentation listing paper, process, ink, signature location, blind stamps and whether the edition is post-mortem. Several US states require sellers of multiples to disclose edition facts; Tamarind notes that some jurisdictions oblige sellers to provide edition information on request. UK practice is less statute-driven in the same form, yet dealer and fair standards (IFPDA members, specialist print fairs) still expect the same transparency.
Museum print rooms train the eye that will later read your margin. Object records distinguish plate signatures from pencil signatures below the platemark, quote exact inscriptions, and note tabs and trims. The Cooper Hewitt and Glasgow Whistler catalogues show how Whistler’s late-nineteenth-century butterfly and “imp.” on a tab proved he printed the impression himself. You do not need a butterfly monogram. You do need marks that a registrar can quote without ambiguity.
Professionals also refuse romantic chaos. They do not sign wet ink. They do not guess the next number. They do not release APs that look worse than the edition. They issue a certificate that repeats the fraction on the sheet. When a publisher is involved, they sign against a delivery list so every number is assigned before the courier leaves.
Sotheby’s overview of edition markings for collectors stresses that signatures may appear on labels, certificates, bases or the reverse as well as in the margin, and that understanding the intended signing method for a given edition matters as much as finding a mark. As a maker you set that intention: choose recto margin, verso or certificate-plus-verso, then repeat it for every impression in the project. Dealers who handle IFPDA-standard inventory expect that clarity without a phone call.
Costs and When to Call Someone
Solo signing costs almost nothing in materials: a few pounds for hard pencils, gloves, glassine and a notebook. The real cost is time and error. Budget an unhurried hour for a small edition of ten to fifteen sheets once the layout is set; larger editions need breaks so your signature does not drift. Mistakes that force you to discard a signed sheet waste paper and press time already spent. If a single impression’s materials and labour sit at £40–£120 depending on technique and paper, a signing error is expensive even when the pencil was cheap.
Collaborative workshop fees vary by residency, press and edition size. Tamarind’s published collaborative project outlines (for example recent CCPRO calls) bundle edition counts, one artist proof, one printer’s proof and an archive impression into a workshop fee in the low thousands of US dollars for small editions. Treat those figures as institutional examples, not a UK price list. UK open-access print studios often charge press hire by the day or half-day plus paper; ask whether staff will help with curation and documentation or only with printing. Publisher projects may advance production costs and recover them from early sales under a written split; CAA walks through those structures in plain language.
Call a master printer or publisher when the edition is large enough that quality drift becomes probable, when multi-run colour registration exceeds your solo control, when a gallery or museum sale requires workshop documentation and chops, or when a contract must allocate AP, PP and HC counts before you start. Call a solicitor or specialist arts adviser when money, copyright licensing and distribution splits enter the same agreement as the BAT. CAA’s guidelines are a briefing document, not a substitute for legal advice. Hire a framer who understands floating signatures and verso marks before you commit a whole edition to frames that hide the pencil line.
Keep DIY signing when you print small editions yourself, when you already keep clean logs, and when buyers receive a certificate that matches the sheet. Move to a workshop model when reputation, volume or technical risk makes an unsigned or poorly marked stack too expensive to repair later.
Budget documentation time beside press time. An edition of thirty with four APs needs thirty-four certificates or one master schedule plus per-sheet slips, plus updates when galleries consign stock. Artists who skip that paperwork save an afternoon and spend a winter reconstructing sales from memory. Pair the signing session with a certificate batch so the graphite and the PDF leave the studio together.
FAQ
Where do I write the edition number on a limited edition print?
Write the fraction in pencil under the image on the lower left. Put an optional title in the lower centre and your signature on the lower right. That left–centre–right layout is the common studio convention described by Handprinted, Print Council NZ and many workshop primers. If the print is full bleed, use the bottom edge of the image or the verso, and say on the certificate where the marks sit.
Why sign in pencil instead of ink?
Graphite is difficult to forge with photomechanical or digital reproduction, sits quietly beside the image, and erases if you catch a mistake before the sheet leaves the table. Soft ink pens can feather on printmaking papers and photograph like printed captions. Hard pencils (around 2H) smear less than soft sketching leads when sheets are interleaved.
Do artist’s proofs count inside the 1/50 fraction?
No. A/P (or E.A.) marks sit outside the numbered edition. CAA’s guide ceiling is about 10 per cent of the numbered total. Disclose the AP count in the documentation so a buyer of 12/50 knows other authorised sheets exist. Do not treat APs as an undeclared second edition.
What does B.A.T. mean, and who keeps it?
Bon à tirer means the approval proof “good to pull.” The printer matches the edition to that sheet. IFPDA states there is only one BAT for an edition. Ownership depends on the contract: at Tamarind the BAT belongs to the printer; CAA notes it may later be sold or held by the artist. Mark only one sheet BAT.
Should the fraction match the order of printing?
Not necessarily. After you curate the stack, any accepted sheet may receive any unused number. Match-to-BAT quality matters more than press chronology for most contemporary editions. Keep the log so you never issue two sheets marked 7/30.
Can I sign a digital or giclée print the same way?
If the work is an original print conceived for digital output, you can number and sign like any other limited edition and document printer, paper and file control. If the sheet is a reproduction of a painting, label it as a reproduction in the paperwork; many print studios discourage hand-signing reproductions as if they were original prints. Honesty of category matters more than the pencil brand.
What belongs on the certificate of authenticity?
Repeat the title, year, medium, paper, image and sheet size, edition total, proof counts, the specific number on this sheet, signature location, printer or workshop if any, and your contact or publisher identity. CAA’s documentation list is a useful checklist. The certificate should agree with the pencil marks; it should not invent a smaller edition than the fraction shows.
When should I cancel the plate or delete the file?
When the limited edition and agreed proofs are complete. Pull a cancellation proof if the process allows, or record destruction or scoring of the matrix. For digital editions, state whether anyone still holds a print-ready file. Leaving a live matrix “for emergencies” is how undeclared extras appear years later.
Galleries mentioned
Museums mentioned
Related reading
Monet's Monumental 'Iris' Commands €50m in Paris
A landmark auction results in a new domestic benchmark for Impressionist masterworks

Anselm Kiefer's Monumental Canvas Finally Leaves Storage with Bespoke Chipperfield Pavilion
A dedicated architectural intervention brings the artist's largest works into public view
Quebec Museum Unveils Dedicated Pavilion for Jean Paul Riopelle
A major architectural addition dedicates space to Canada's most celebrated modernist painter